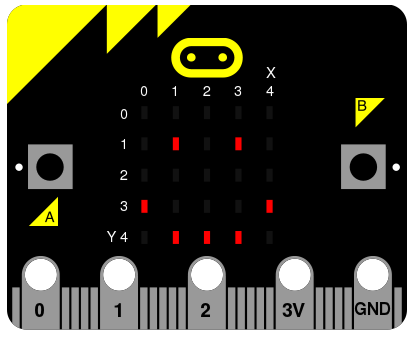
LED Display
This is a quick guide to some of the things you can do with the LED display. Try things out – see what happens and see what you can make. There are 25 LEDs numbered from (0,0) in the top left hand corner to (4,4) in the bottom right hand corner and can all be set to a different level of brightness. You can use the LEDs like a screen to display single characters, a strings or a small picture.
Basic Functions
Display a string or an image
You can display characters on the LED display using show method:
from microbit import *

display.show("Hello")
The characters you display must be within a pair of quotes, either ” ” or ‘ ‘.
microbit module comes with many built-in pictures to show on the display.
For example, to display a smiling face
from microbit import *

display.show(Image.HAPPY)
Here’s some of the the other images you can use:
Image.HEART,Image.HEART_SMALLImage.HAPPY,Image.SMILE,Image.SAD,Image.CONFUSED,Image.ANGRY,Image.ASLEEP,Image.SURPRISED,Image.SILLY,Image.FABULOUS,Image.MEH,Image.YES,Image.NOImage.ARROW_N,Image.ARROW_NE,Image.ARROW_E,Image.ARROW_SE,Image.ARROW_S,Image.ARROW_SW,Image.ARROW_W,Image.ARROW_NWImage.MUSIC_CROTCHET,Image.MUSIC_QUAVER,Image.MUSIC_QUAVERSImage.XMAS,Image.PACMAN,Image.TARGET,Image.ROLLERSKATE,Image.STICKFIGURE,Image.GHOST,Image.SWORD,Image.UMBRELLAImage.RABBIT,Image.COW,Image.DUCK,Image.HOUSE,Image.TORTOISE,Image.BUTTERFLY,Image.GIRAFFE,Image.SNAKE
Scroll a string
Use scroll to scroll a string across the display:
from microbit import *

display.scroll("Hello!")
Clear the display
If you want to clear the LED display, you can do so like this:
from microbit import *

display.clear()
Advanced Functions
Set a pixel
You can set a pixel brightness on the LED display using the set_pixel method:
from microbit import *

display.set_pixel(0,4,9)
This sets the LED at column 0 and row 4 to a brightness of 9. The brightness value can be any whole number
between 0 and 9 with 0 switching the LED off and 9 being the brightest setting. You could use a for loop
to set all the LEDs one at a time:
from microbit import *

display.clear()
for x in range(0, 5):
    for y in range(0, 5):
        display.set_pixel(x,y,9)
The for loop lets you execute a loop a specific number of times using a counter. The outer loop:
for x in range(0,5)
will execute the loop five times substituting x consecutive values in the range 0 to 4 for x each time. The loop will stop before it reaches the final value in the range.
The inner loop:
for y in range(0,5):
will execute the loop five times substituting y consecutive values in the range 0 to 4 for y each time. The loop will stop before it reaches the final value in the range.
DIY images
What if you want to make your own image to display on the micro:bit?
As mentioned above, each LED pixel on the physical display can be set to one of ten values from 0 (off) to 9 (fully on). Armed with this piece of information, it’s possible to create a new image like this
from microbit import *

boat = Image("05050:"
                "05050:"
                "05050:"
                "99999:"
                "09990")

display.show(boat)
In fact, you don’t need to write this over several lines. If you think you can keep track of each line, you can rewrite it like this:
boat = Image("05050:05050:05050:99999:09990")
(When run, the device should display an old-fashioned “Blue Peter” sailing ship with the masts dimmer than the boat’s hull.)
Have you figured out how to draw a picture? Have you noticed that each line of
the physical display is represented by a line of numbers ending in : and
enclosed between " double quotes? Each number specifies a brightness.
There are five lines of five numbers so it’s possible to specify the individual
brightness for each of the five pixels on each of the five lines on the
physical display.
Animation
To make an animation, just use a list of images.
We can demonstrate this on built in lists - Image.ALL_CLOCKS
and Image.ALL_ARROWS:
from microbit import *

display.show(Image.ALL_CLOCKS, loop=True, delay=100)
Micro:bit shows each image in the list, one after another. By setting loop=True, program will be keep looping through the list indefinitely. It’s also possible to
set a delay between the pictures using the delay attribute to the desired value in milliseconds delay=100.
To create your own animation, you need to create a list of images.
In this example, a boat will sink into the bottom of the display. To do that, we defined a list of 6 boat images:
from microbit import *

boat1 = Image("05050:"
              "05050:"
              "05050:"
              "99999:"
              "09990")

boat2 = Image("00000:"
              "05050:"
              "05050:"
              "05050:"
              "99999")

boat3 = Image("00000:"
              "00000:"
              "05050:"
              "05050:"
              "05050")

boat4 = Image("00000:"
              "00000:"
              "00000:"
              "05050:"
              "05050")

boat5 = Image("00000:"
              "00000:"
              "00000:"
              "00000:"
              "05050")

boat6 = Image("00000:"
              "00000:"
              "00000:"
              "00000:"
              "00000")

all_boats = [boat1, boat2, boat3, boat4, boat5, boat6]
display.show(all_boats, delay=200)
Practice questions
- Try out some of the built-in images to see what they look like.
- Animate the
Image.ALL_ARROWSlist. How do you avoid looping forever (hint: the opposite ofTrueisFalse). Can you change the speed of the animation? - Make your own image. Next try to make it fade out and then fade in again?
- Make a sprite, use a single LED on the display. Can you make it jump when you press a button?